Episode 02: The Anatomy of a Quilt
Hello and welcome to the Hand Quilted Podcast. I’m Taniya Barrows, a hand quilter attempting to stitch my own path through a machine quilted world. I’m also a creative writer who loves to tell stories. With this podcast I am piecing together these two passions of mine to share my hand quilting projects, misadventures, and life lessons learned one stitch at a time. I invite you to grab your needle, thread, and thimble, and join me on my hand quilting journey.
Episode 2 - The Anatomy of a Quilt
My vision with this podcast is to share my quilting stories in a manner that is more story and less quilting, at least less of the technical side of quilting. My personal exploration within this craft is less about design and technique and more about simply making the stitches with my needle and thread. My aim for this podcast is to focus on how that simple act has impacted my life. I would also like for my stories to be accessible to those beyond the quilting community, and as such I’d like to make sure we all share a vocabulary and an understanding of the same vernacular. So, let’s pause from the storytelling for a moment and focus on building that shared language around quilts and quilting terminology, at least as I understand it and tend to use it.
I’d like to start with the sandwich itself as I believe the components of any quilting project are best illustrated in that phase of the quilt making process. That’s also the phase I spend the most time with and thus feel the most connected to, or maybe I’m just really hungry, either way let’s start with the sandwich.
Simply put, a quilt is made up of three layers of material that is often called the quilt sandwich.
To make the sandwich you start by making the quilt top, which is the fancy part of the quilt that is usually made from beautiful pieces of fabric that have been cut up into smaller bits of fabric just to be sewn back together again into a larger sheet of fabric that now features some sort of design or pattern thanks to all of those original smaller fabric bits.
I should take this moment to clarify that the act of sewing all these bits and pieces of fabric together is referred to as piecing. While I have been playing around with some hand piecing projects lately, I do primarily use my sewing machine to do my piecing, and I don’t anticipate that changing. I tend to get anxious to be done with all the piecing and putting together of a quilt, and my anxiety builds when I don’t have something at the ready to be hand quilted. So, when I’m making a new quilt top, my aim is alway to hurry up and get done, that way I can get to the quilting part as quickly as possible. But we’ll talk about what that means in a minute.
Also, it should be shared that even though piecing bits of fabric together may be the more common way to make a quilt top, it’s not a requirement. There are some incredible whole cloth quilts out there. These quilts have a solid piece of fabric for the top that allows for the quilting stitches alone to make up the whole quilt’s pattern and design instead of fabric pieces doing that. I haven’t made a whole cloth quilt yet, but maybe someday.
Next up comes the batting, the meat of the sandwich, which is a kind of filler material typically made of cotton, wool, or polyester. The batting is kind of like the stuffing in a pillow, but instead of being big and puffy it’s flat and thin like a really think flannel sheet. When the batting is laid out, it is important to make sure it extends out beyond the edges of the quilt top, kind of like a fully loaded roast beef sandwich with the meat and lettuce and pickle and all that good stuff jutting out from underneath the top slice of bread.
And then there’s the backing, which is typically a single fabric pieced together, as needed, to make a large enough sheet of fabric that is slightly bigger than both the quilt top and that middle sheet of batting. To go back to my roast beef sandwich analogy, this sandwich would have a larger bottom slice of bread than the top slice, and this bottom slice would fully contain the meat and lettuce and pickle and all that good stuff within its crust boundary. All of this excess backing fabric and batting material is important to ensure that there is enough of each left over after all of the quilting has been finished.
When we’re dealing with quilts that are of the size that can be used in a blanket-like capacity, such as a comforter on a bed, or a throw for the couch, or the roof and walls of a blanket fort, these quilts are larger than the fabric’s width when that fabric is first purchased from the store, which is no problem! A quick bit of quilting math helps you figure out the yardage needed and then instead of cutting small pieces to sew together into a pattern, you cut really large pieces to sew together into one large sheet. The real trick to piecing the backing together is matching the fabric’s pattern so that those pieces that make up the backing look as if they have always been just one large sheet of fabric. That’s not exactly an easy thing to do, especially if there’s a distinct pattern on the fabric. I’ve only managed to do it twice so far, and it’s always the part of those quilts I’m most proud of and have to show off first!
Because the backings of these quilts typically need to be pieced together, it allows for extra bits of creativity for the quilter, and sometimes you’ll find they’ve added splashes of color, or carried design features from the top over to the back, or even discover a whole separate design. The backing of a quilt is limited only by the quilter’s imagination. Personally, for my quilts I like to use a single fabric with minimal design because I think my favorite part of a quilt’s backing is when it can highlight the pattern made by just the quilting stitches, a lot like a whole cloth quilt would. So, the next time you encounter a quilt, be sure to turn it over and take a moment to appreciate the back of it.
Okay, next up, we have the basting.
Once the quilt top and the backing are pieced together and the batting material is at hand, all three of these layers are laid out in their proper order, which is usually: backing, batting, and then top. And then congratulations, the quilt sandwich is made! But now in order to do anything with it, it must first be temporarily secured together in a process called basting. The basting can be done in a couple of ways.
There’s glue basting that uses a special adhesive applied to the batting as it is pressed onto the fabric of the backing, and then applied again as the quilt top is laid out on top of the batting. This helps it all stick together. Glue basting is kind of like using condiments on a sandwich, but instead of mayonnaise or mustard spread out between the bread and meat, this is a sticky glue that is safe to be used on fabrics.
There is also thread basting that involves sewing all three layers of the quilt sandwich together with very large stitches all across the quilt. I’m sorry, with this one I think I’m running out of food based analogies. I also don’t usually sew my actual sandwiches together, so I’ve really got nothin’ here.
Then you’ve got the process I use which is called pin basting where you use a whole bunch of safety pins spread out every few of inches or so across the whole quilt to hold all three layers together. I guess this would be kind of like using toothpicks to hold your sandwich halves together. And with that, I think I really am out of food based analogies now.
All of these basting methods are temporary, and the choice of which one to use is personal to each individual quilter. The important part is that they all accomplish the task at hand: secure the three layers of the quilt sandwich in place until the quilting process is completed.
The quilting process itself, often simply referred to as “quilting,” is the act of permanently sewing all three layers of the quilt sandwich together. This is done with a smaller, more intricate stitch than what is used in thread basting. These quilting stitches go across the whole quilt, from edge to edge, top to bottom. The quilting can be elaborate and decorative, or simple and plain, or any and everything in between. A general rule of thumb is to start your quilting stitches in the middle of the quilt and work your way out toward the edges. This allows for any adjustments to the layers of the quilt, if needed, and to help keep wrinkles from getting trapped within the stitches. However, as with all things quilting, there are many exceptions to this start-in-the-middle rule. I mention it primarily because it’s the way I tend to quilt my quilts.
And I’ve gotta tell ya, this step, this big, giant, what-makes-a-quilt-a-quilt step, the actual quilting process step is my favorite step to do by hand. It is why I quilt, why I have these stories to share, and why I’m making this podcast. However, it is also a step most commonly done with a machine, which is fine. There is nothing wrong, or bad, or better, or worse about machine quilting, it is simply not the way I quilt. But the reality of being the lone hand quilter around has made me evaluate why I do this. It has forced me to reconcile with what hand quilting continues to mean to me, and how it makes me different from the quilting community I find myself surrounded by. Thankfully, the more I reflect on my hand quilting, the more I love it and feel called to continue stitching away with my needle, thread, and thimble always at hand. But you know, while sometimes being different is just fine, there are other times it just feels lonely.
Unfortunately, even within the hand quilting community, I’ve kind of found my place a little bit on the outside of that group as well because I don’t make use of either a hoop or a frame when I quilt. I just hold everything in my lap and smooth everything out as I go. For me it works, and that’s the most important part of my quilting journey, and of anyone’s quilting journey. You’ve got to find what works for you! But, we should talk about those hoops and frames anyway because they are important quilting tools that I will be mentioning in episode three, and possibly periodically thereafter.
A hoop is little more than two circles (usually wooden) that fit snuggly together. The inside circle is solid, and the outside circle has a small opening secured with a screw so that it can be opened and closed, or rather loosened and tightened. To use it, take the two circles apart, lay the section of the basted quilt sandwich you’re working on across the smaller circle and secure it together with the top circle, tightening the screw closure as needed, and voilà! You’re now quilting with a hoop. There is a bit more nuance and technique to it than that, but I’m just here to explain the fundamentals. I do believe a quilt should only be in a hoop while its being actively worked on and then taken out of the hoop between quilting sessions to protect it from potential damage from prolonged time being squeezed in between the two parts of the hoop.
With a frame, a quilt can be loaded into it once and left there until it is finished. The frame itself is a larger contraption than a hoop. Depending upon the size and design of the frame, it will either fully frame a basted quilt sandwich, much like a picture frame does, or allow for it to be rolled up or otherwise secured in a manner that will protect it while it is being quilted a section at a time. For more information on hoops and frames, I will let you do your own research. I’m very much not the expert, and I have just given you all the information I have. A quick internet search will probably help you out from here more than I can.
The detail about both of these quilting tools that is important to know, is that they are used to hold all three layers of a quilt sandwich straight and even making it easier to complete a quilt without stitching wrinkles or bulges or any sort of extra fabric into the finished product. Since I don’t use these items, I do have to be more mindful about what’s happening with the various layers of fabrics and materials within my quilt sandwich while I’m quilting it. As a result, I am often smoothing, pulling, and straightening all of my fabrics and layers, and readjusting my safety pins, which is part of why I like to use the pin basting method.
An interesting quilting tidbit I learned kind of the hard way somewhere in the middle of my third quilt is that the act of quilting actually shifts the fabrics and can shrink the overall size of the quilt. It doesn’t shrink it a whole lot, but remember that part I mention earlier about needing the batting and backing to be larger than the quilt top? Yeah, this is why. When that needle and thread goes up and down through the three layers, it pulls everything together just an itty-bitty bit closer and secures it in place. Over the course of a couple of stitches it isn’t really a big deal, but when you consider how many quilting stitches there are over the entirety of a quilt then that itty-bitty bit of shrinkage that happens with each and every stitch can become enough shrinkage to impact the alignment of all three layers of the quilt sandwich out at the edges. And that is why it’s important to keep the bottom two layers of the quilt sandwich a few inches bigger than the top. Once all the quilting is done, then everything is trimmed up nice and neat and even before the final binding is put on.
The binding is an exciting step to reach because it’s the last step in making a quilt. The binding is a long strip of fabric folded around the edges of a quilt and sewn into place, sealing up that open edge of the sandwich and protecting the insides and edges from a lifetime of wear and use.
Does that now turn our sandwich into a pie? Hmm . . . I don’t know, but I think I’m hungry again.
Anyhow, I like to think of the binding as the frame being put around the finished piece of work.
Fun little plot twist here, I will typically use my machine for the whole process of sewing on the binding, because at this point I’m anxious to be done and move on to my next quilt, while I’ve known many a machine quilter to do the final step of this binding process by hand. Go figure!
The finishing touch to completing any quilt is adding the label. Not every quilter will use a label, but if they do, it’s usually placed in a corner on the back of the quilt. Quilt labels typically contain the standard who, what, where, and why kind of information surrounding the making of the quilt. An example would be, “Made with love by Aunt Susie, Merry Christmas, 2024.” However, I struggle with labeling my quilts with so few words.
For me, after I’ve spent years stitching away on a quilt - and yes, that was “years,” plural! - it’s hard for me to simply leave it at “Made by Taniya, finished this year.” By the time I have finished quilting a quilt and I am preparing a label to attach to it, that quilt has already been loved and incorporated into my family for at least a couple of years. That quilt will have been taken to countless dance classes and soccer practices and swim meets and family vacations and even a writing retreat or two. That quilt has spent years being a part of our family evenings at home, unwinding at the end of a day, snuggled in for family movie nights, hunkered down inside during rain storms, and all of the other important, mundane moments in our everyday lives. Therefore, how, I ask you, after completing a quilt that has already been through so much with me and my family, do I simply say “Made with love, finished today?” I can’t. I just can’t! So when I make a label for the backs of my completed quilts, I tend to write a little story capturing at least a small part of the lives my quilts have already lived whilst between my needle, thread, and thimble.
Thank you for pausing with me and taking the time to review the anatomy of a quilt. I hope this has been helpful in decoding a bit of the language used within the quilting world, and that it will allow for everyone to enjoy the stories I have to share about my hand quilting journey.
The Hand Quilted Podcast is written, recorded, and produced by me, Taniya Barrows, with music by Craig Riley, and logo design by Shelly Mullin. If you would like to see pictures of some of my quilts in the various stages I’ve been talking about, you can find them on my website at www.handquiltedpodcast.com. While there, you can also find a transcript of today’s show.
To see what I’m currently working on you can follow me on Instagram @handquilted, and on Facebook @HandQuiltedPodcast.
If you’d like to support the show you can do so by subscribing through whichever podcasting platform you use and leave me a rating while there to help other people find me, sharing the podcast with your friends, or by becoming a patron at Patreon.com/HandQuilted. All of my paid patrons can get early access to new episodes.
And before I go, I’d like to thank my very first Patreon supporter: Patti Wohlin, who also happens to be my mom. Thanks mom!
The sun shining thorough this completed quilt top helps illustrate all those small fabric pieces that were sewn together to make this beautiful design.
Design Credit: I machine pieced this, but it was a Fons & Porter’s Block of the Month (BOM) kit from 2017 called Fernwood.
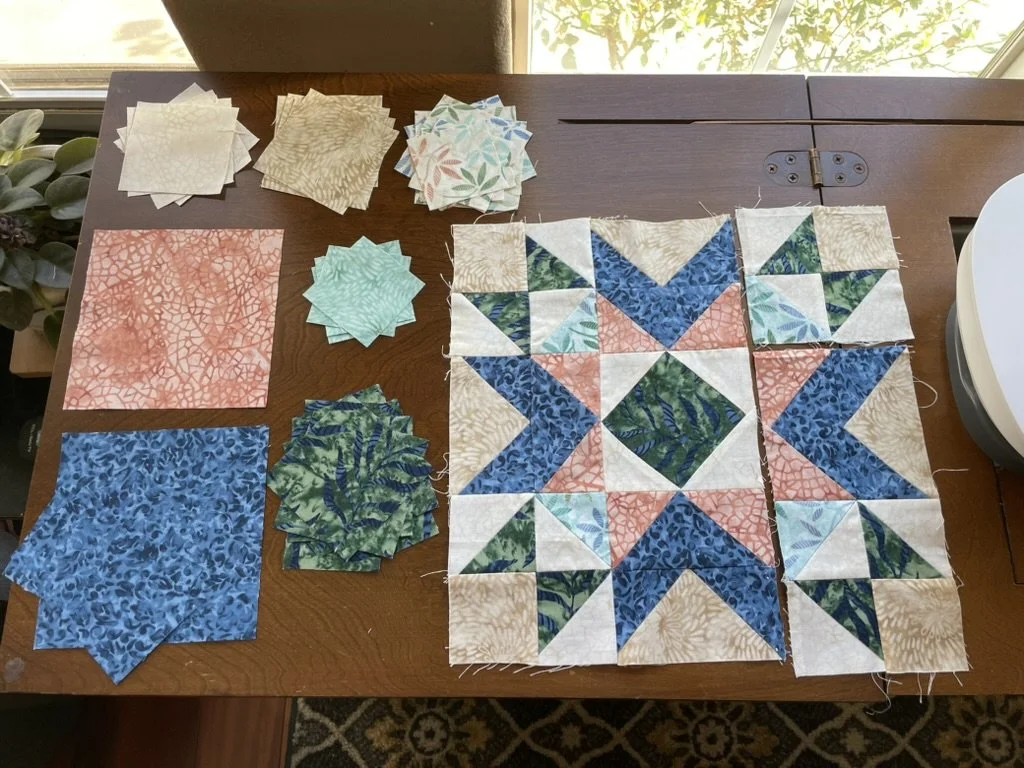
Piecing is all about cutting up cutting up fabric into small bits and sewing it all back together again.
Design Credit: This is a block out of Wing and a Prayer Design’s “Tranquility” BOM from 2018.
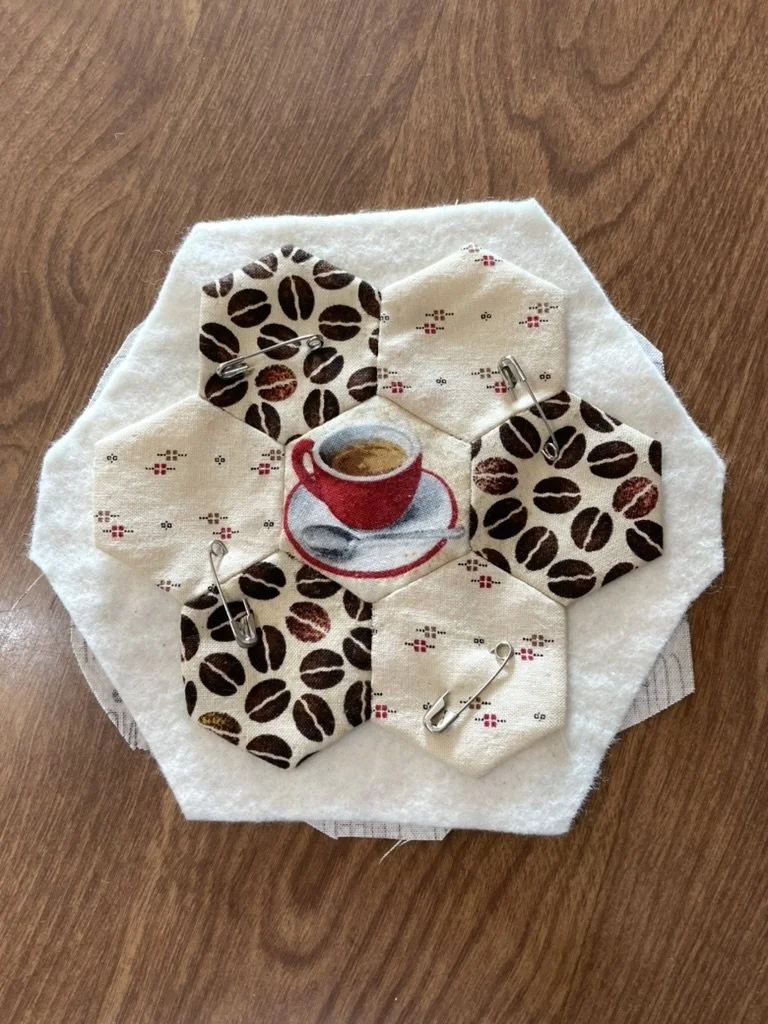
The batting is visible here as it sticks out around the edges of this little mug rug (aka, a coaster) I made.
Design Credit: This was me just playing around with English Paper Pieceing (EPP).
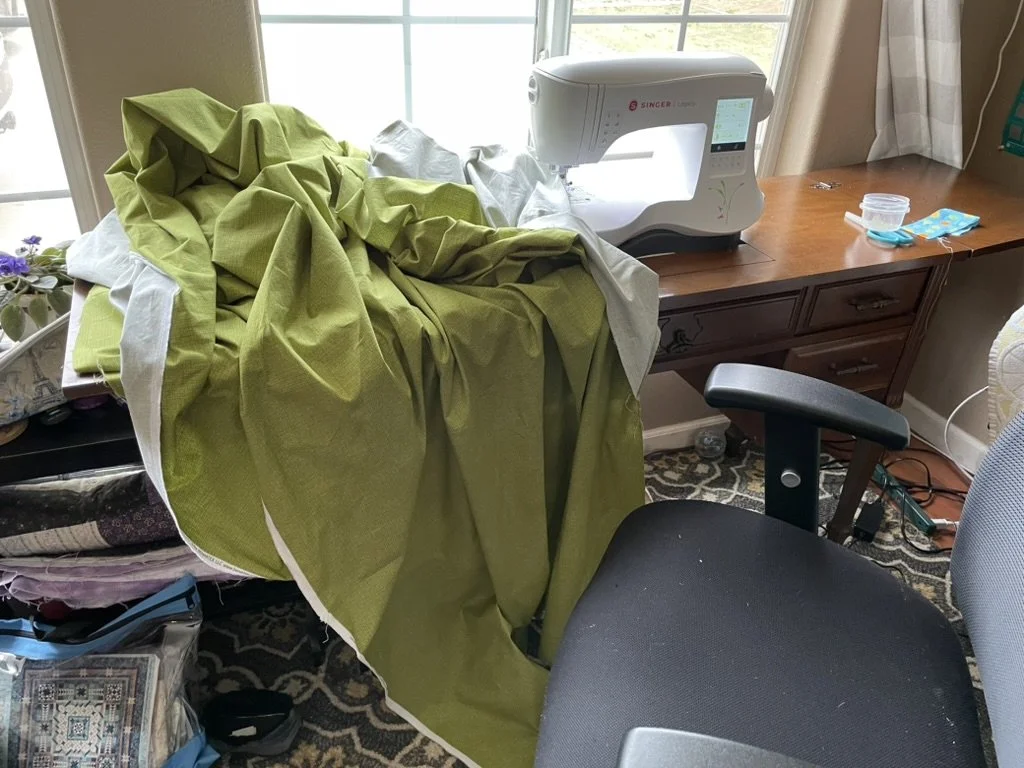
Piecing together the backing. It’s a whole lot of material, but just a couple of seams.
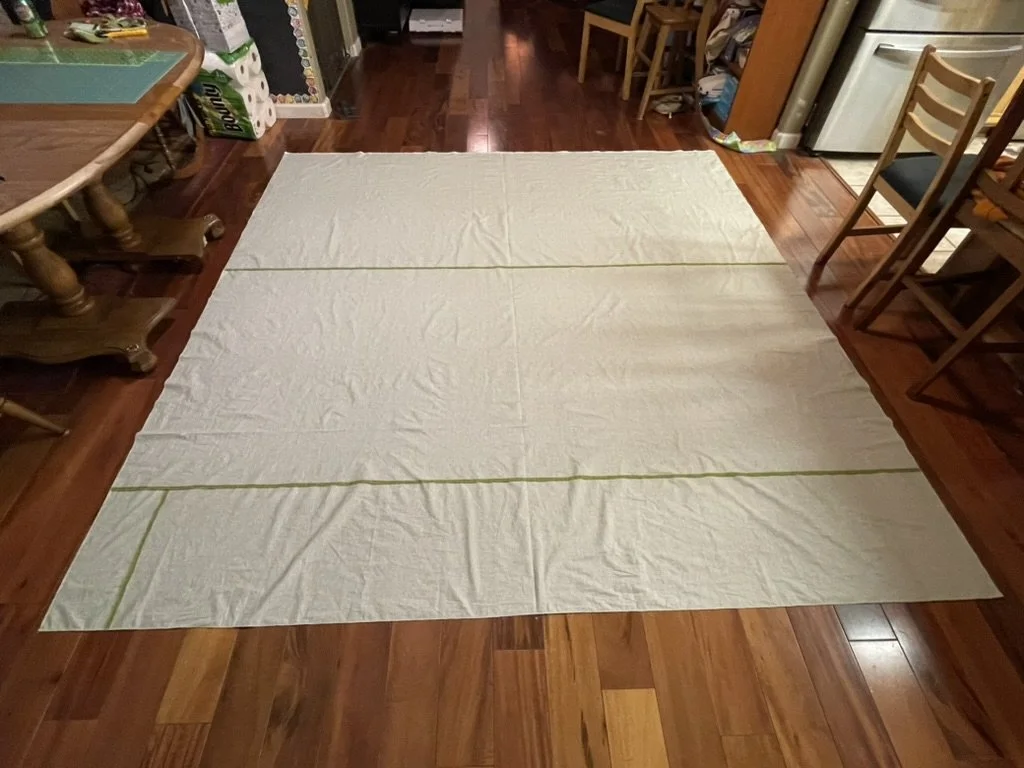
The backing is all pieced together, trimmed, and ready to be made into a quilt sandwich. The batting will be laid out across the backing before the quilt top is laid out.
The quilt sandwich is made! Let the basting begin!!
All basted and ready to go!
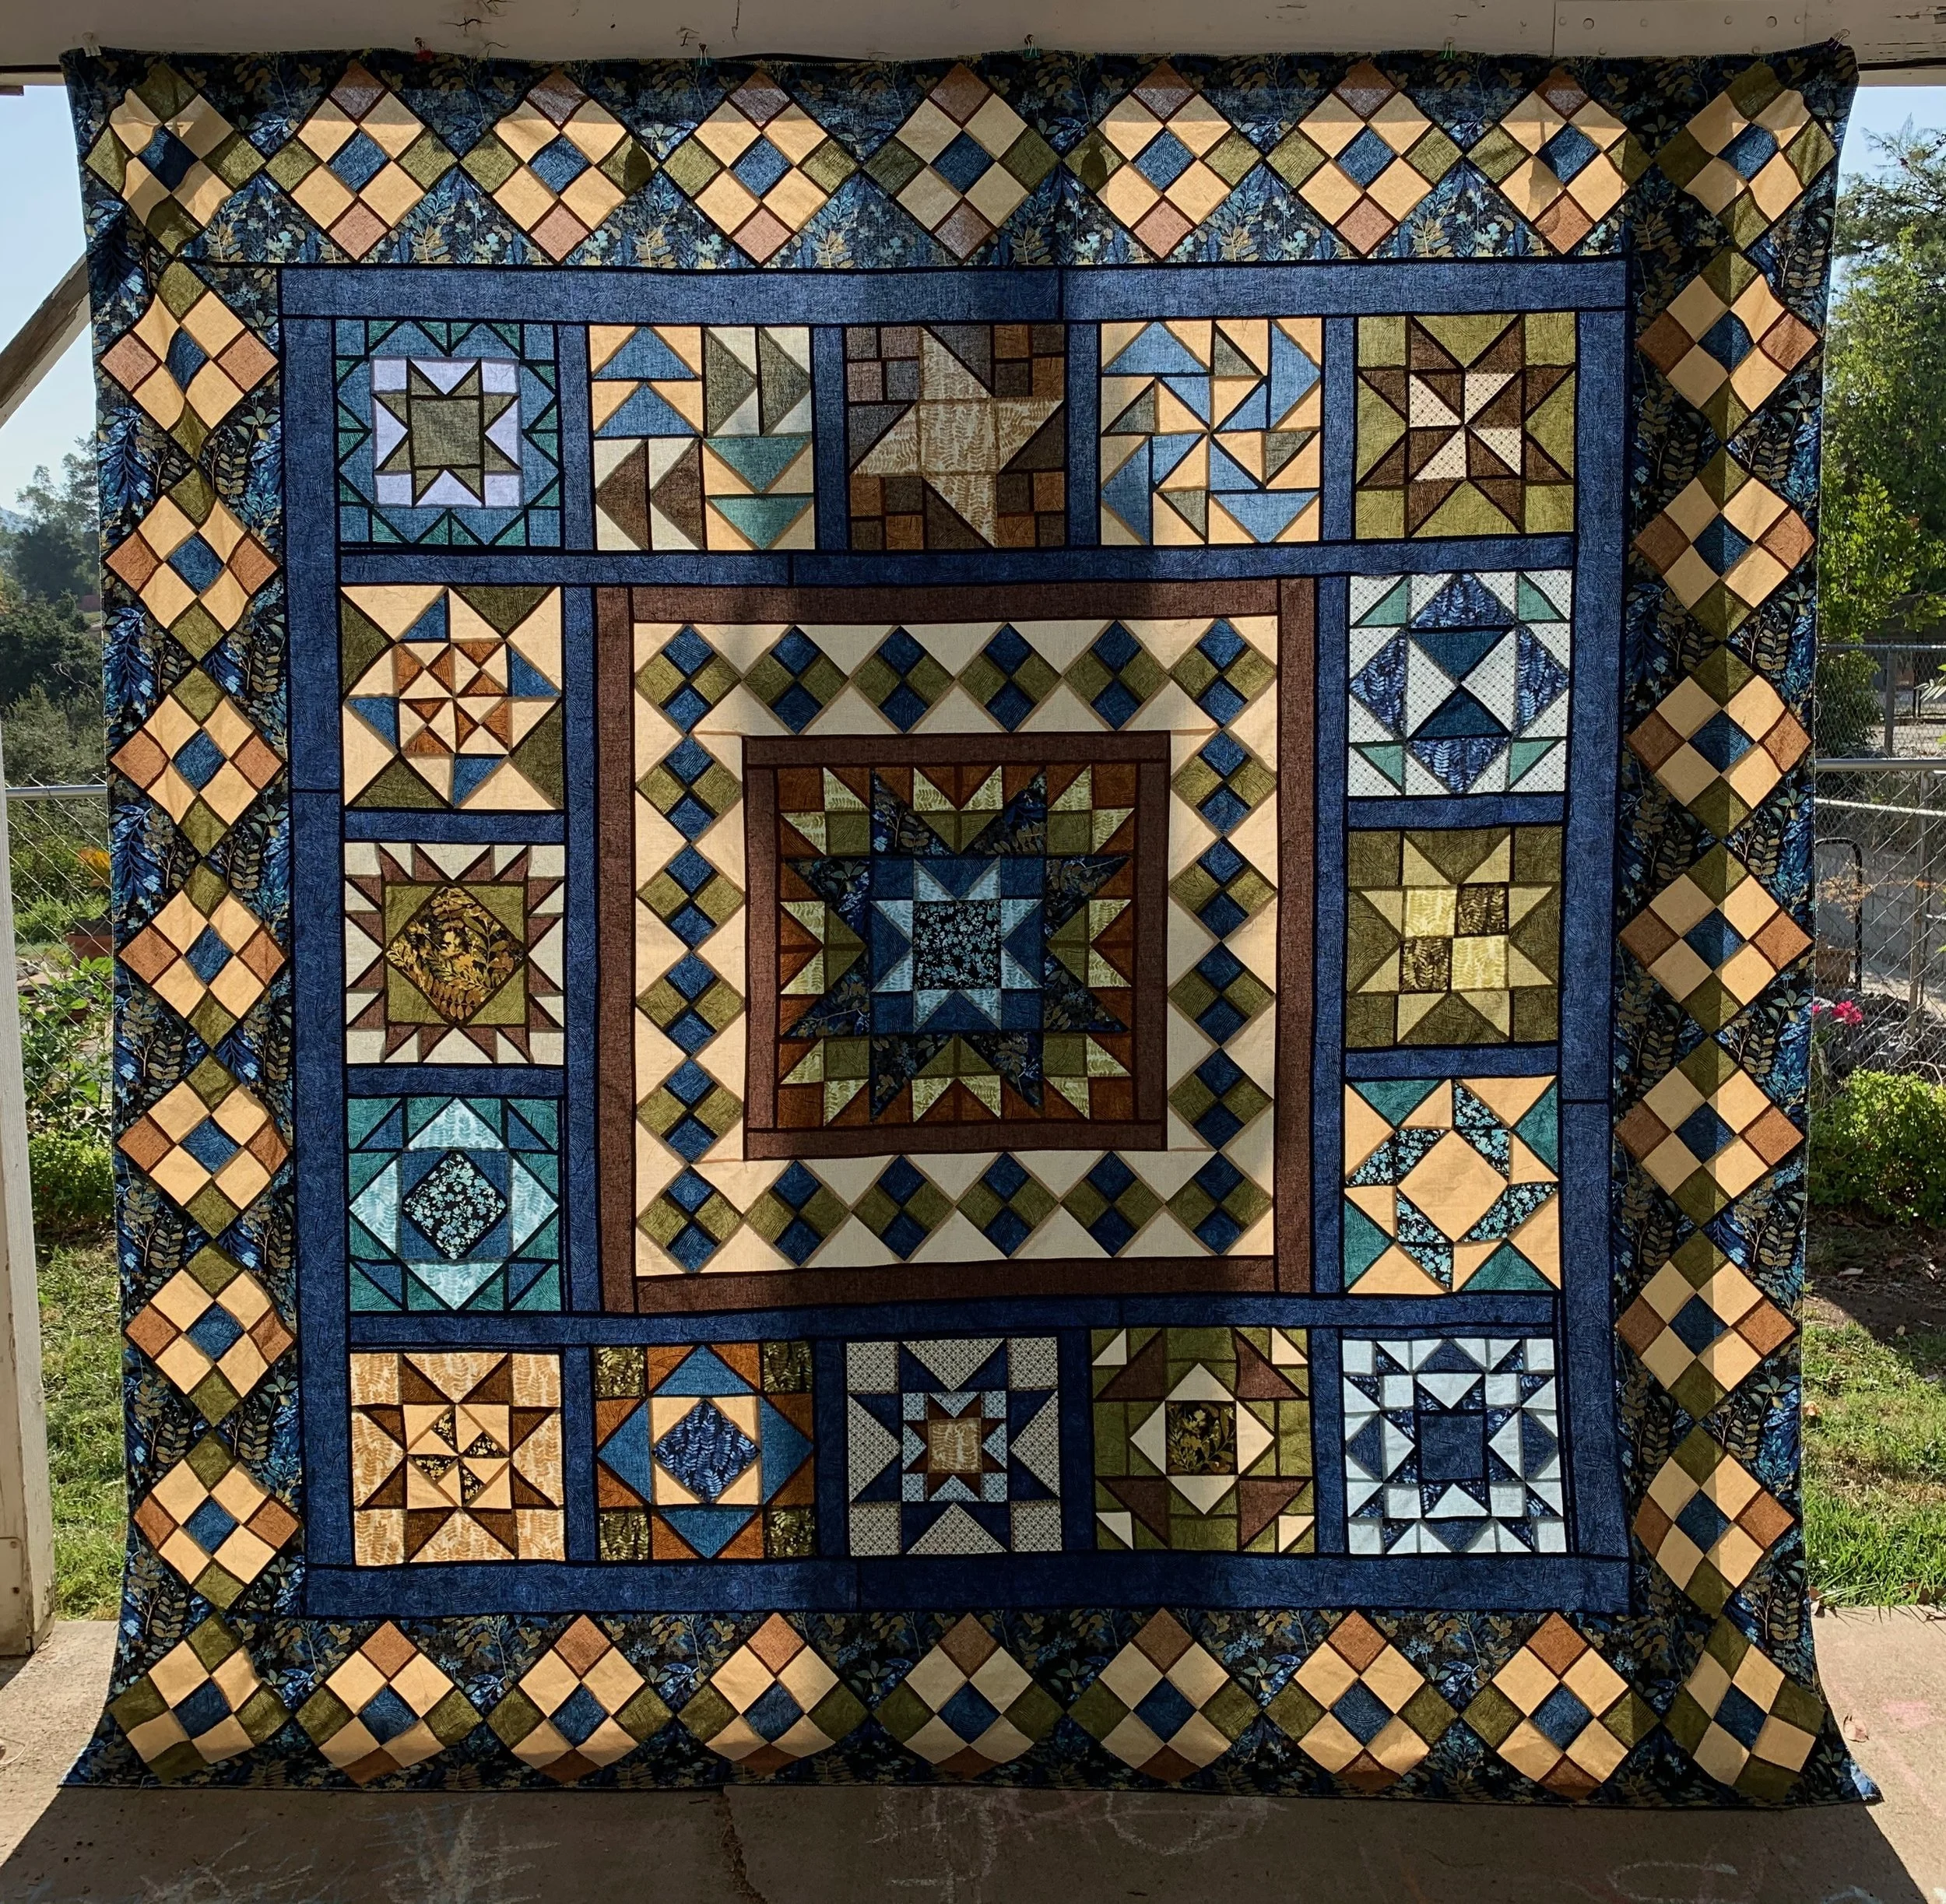
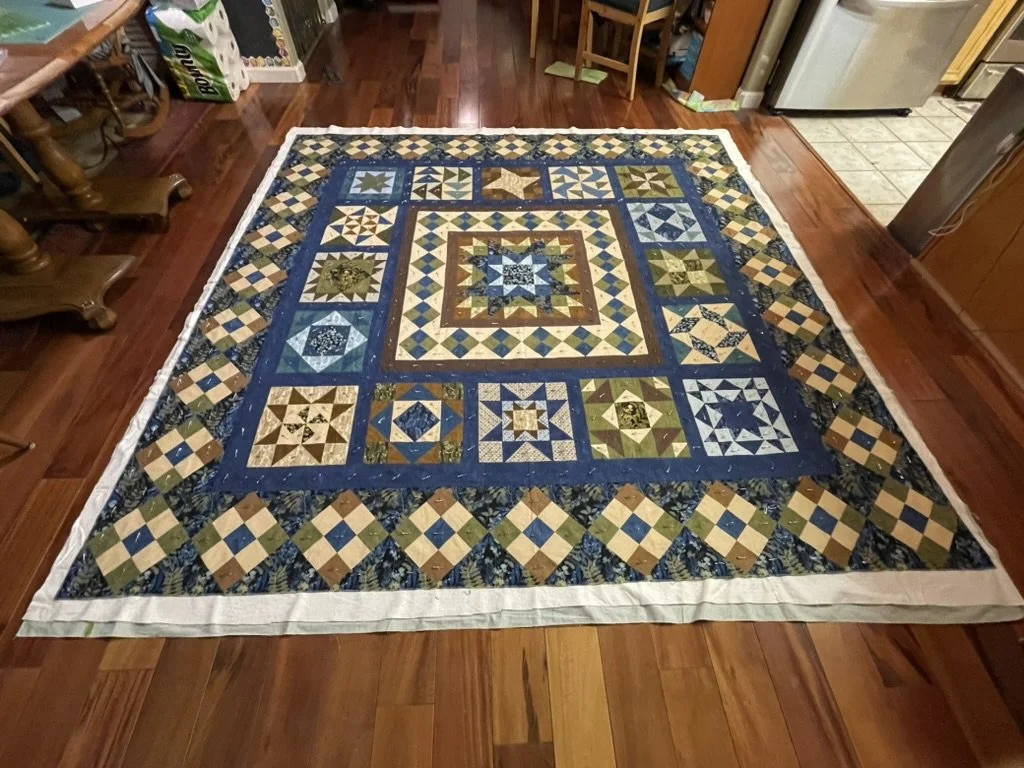
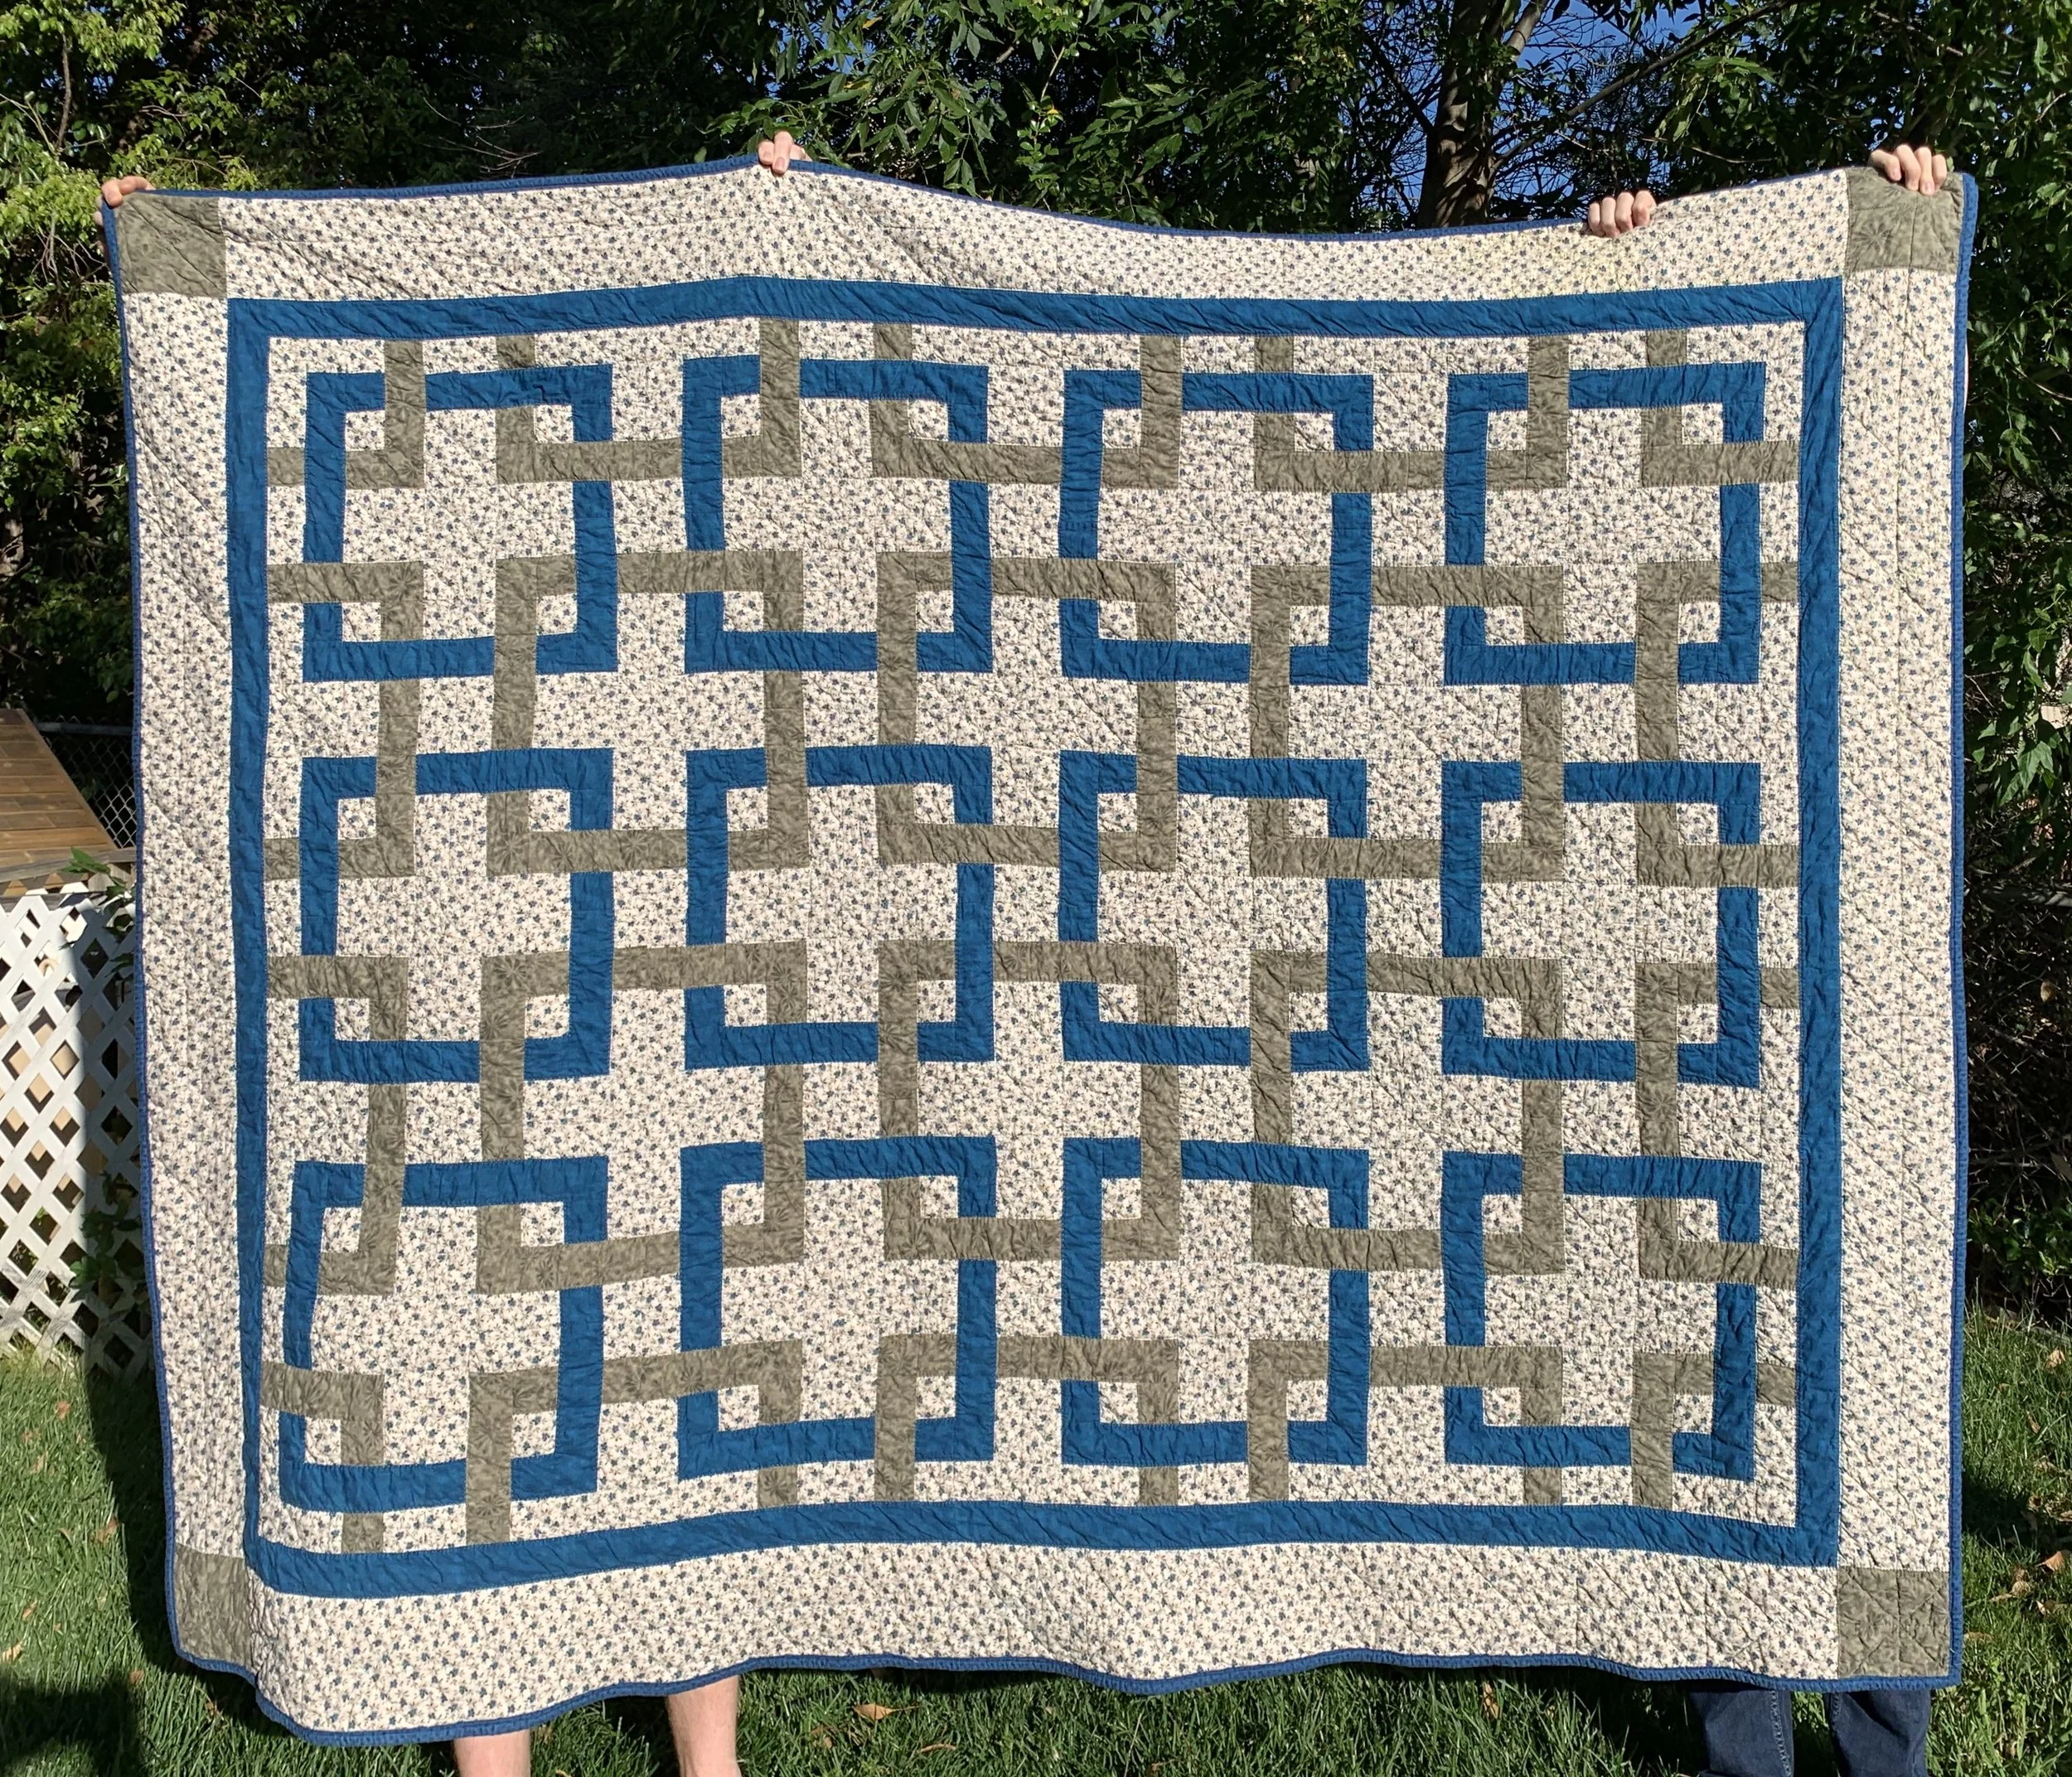
All those stitches seen across the finished quilt is a result of the quilting process.
Design Credit: The pattern I used was “Winter Star” by Missouri Star Quilt Co. with a selection of fabrics that spoke to me as I shopped at my local quilt shop.
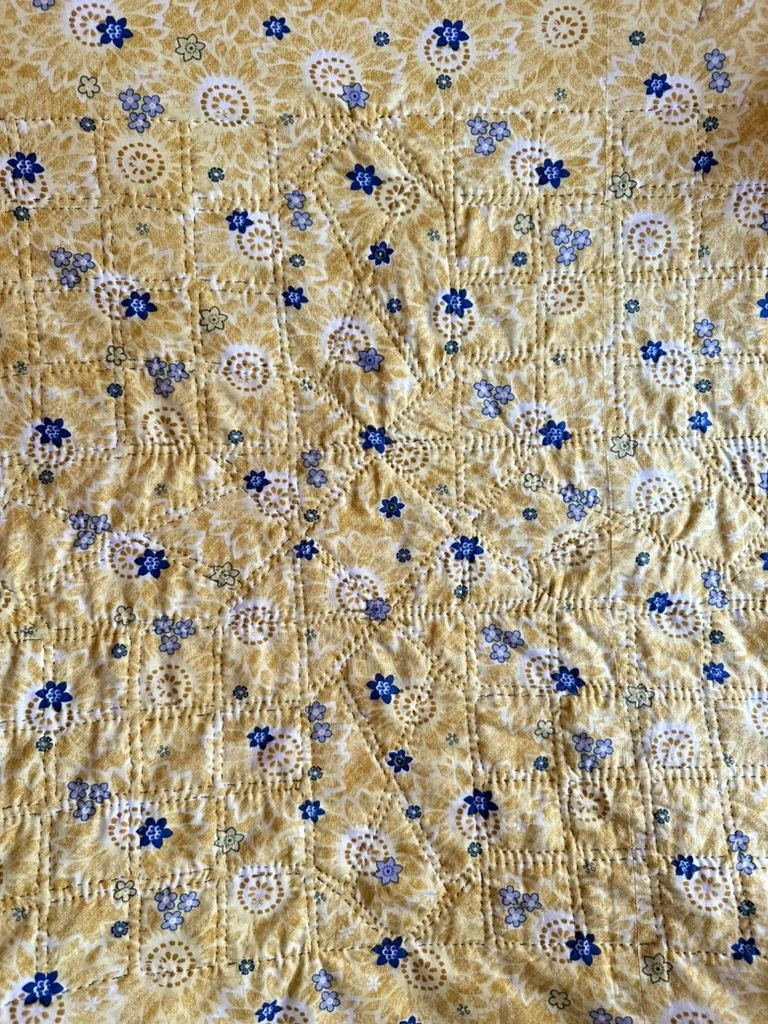
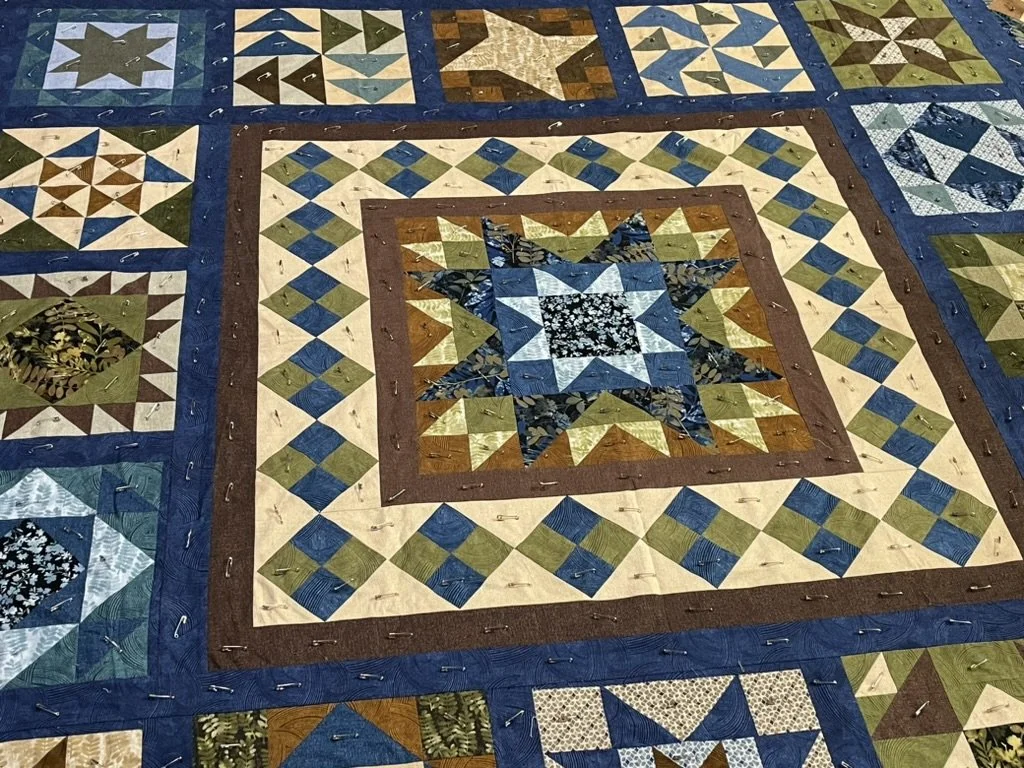
The quilting stitches are stitched through all three layers of the quilt sandwich, so they are visible on the front and the back.
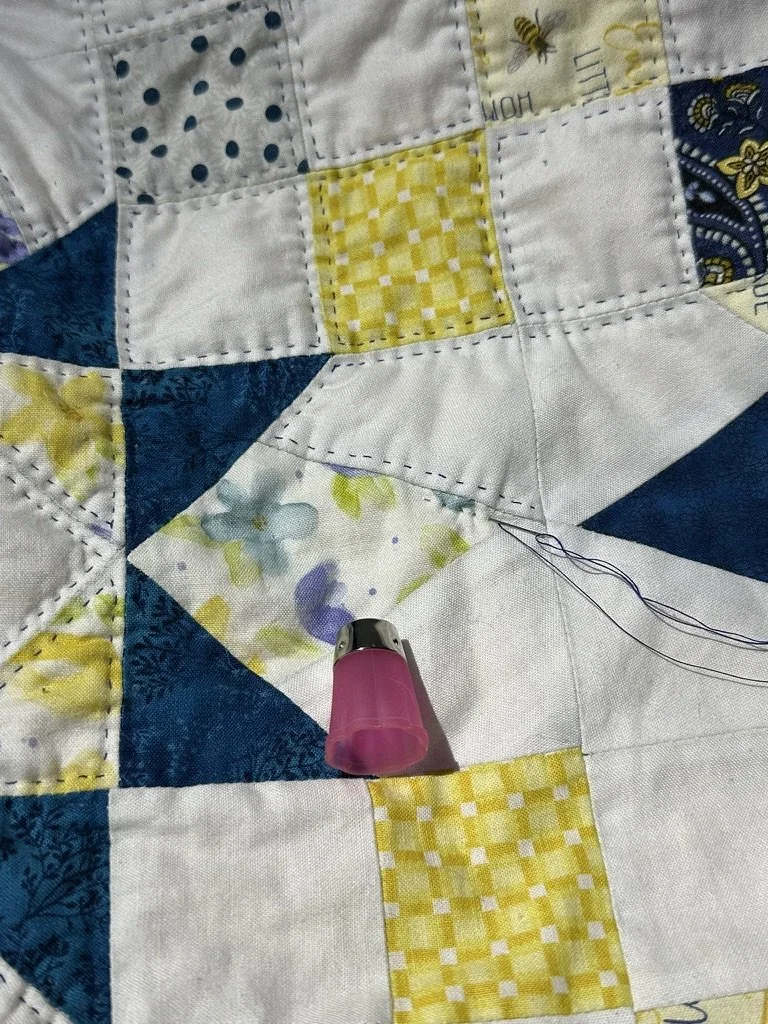
A glimpse into the hand quilting process with my needle, thread, and thimble.

I don’t love using a hoop, but it was required as I finished this quilt. This was also the quilt that taught me the importance of all that excess batting and backing material while quilting.
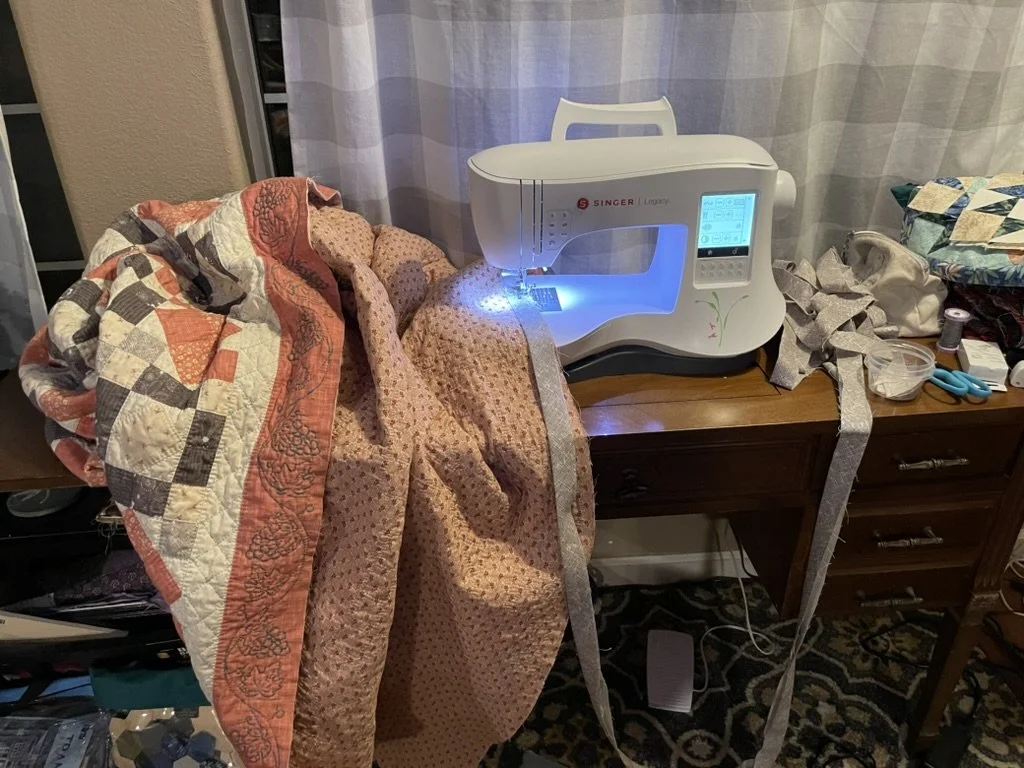
Sewing on the binding. Yes, I know! I’m the hand quilter that uses my machine to attache the binding. Irony is fun!
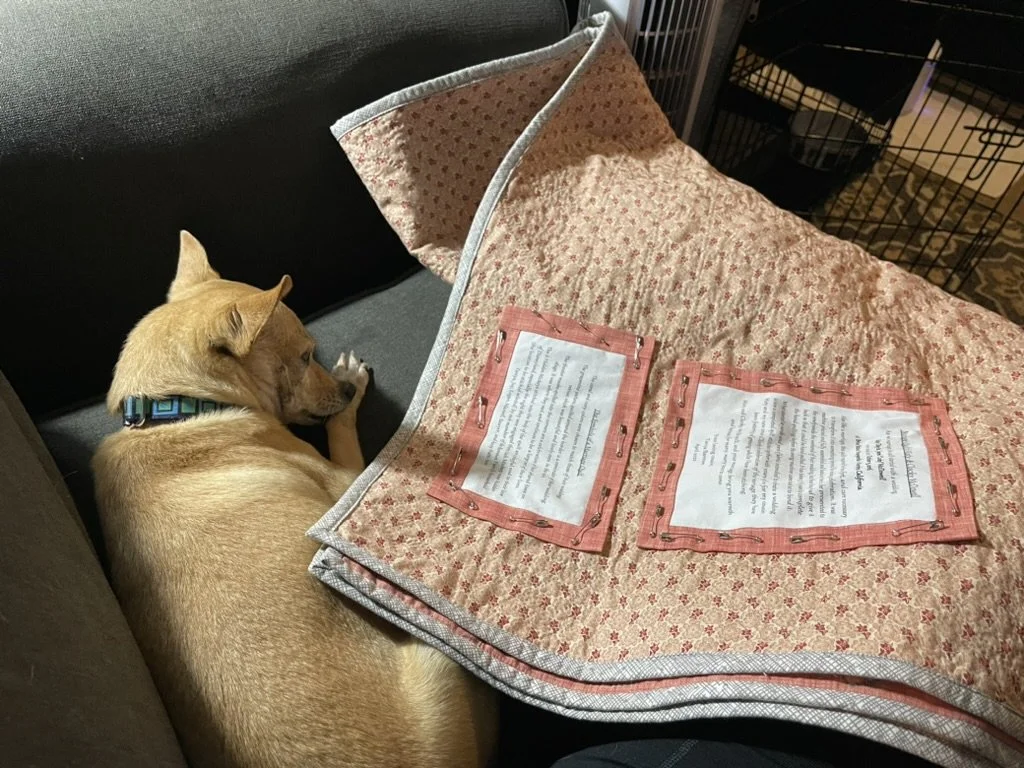
After finishing the binding, I added two labels to this very special marriage quilt.
And voilá, you’ve got yourself a finished quilt!
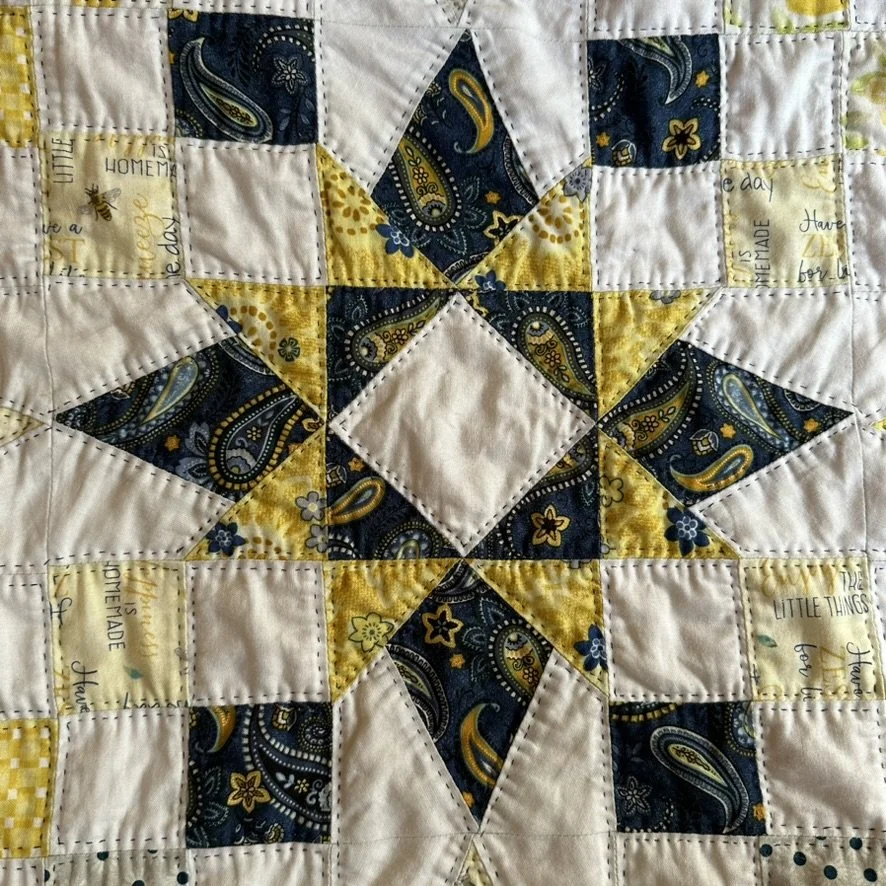
Design Credit: I made this quilt through a mystery quilt class, which was lots of fun, but a class I took early in my quilting days before I understood the importance of crediting the quilt pattern designers.